Creating Users
This guide walks you through the process of creating new users in the Velolink Console.
Prerequisites
- Administrative access to the Velolink Console
- The email address of the new user
- Understanding of the required access level for the new user
Steps to Create a User
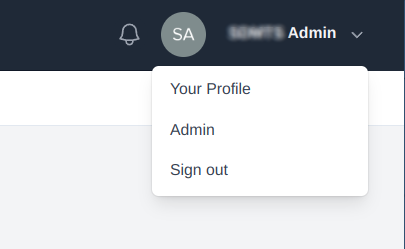
1. Access Admin Panel
-
Log in to the Velolink Console
-
Click on your user profile in the top-right corner
-
Select "Admin" from the dropdown menu
2. Navigate to Users
-
In the admin interface, ensure the "Users" tab is selected
-
You will see a list of current users in your organization
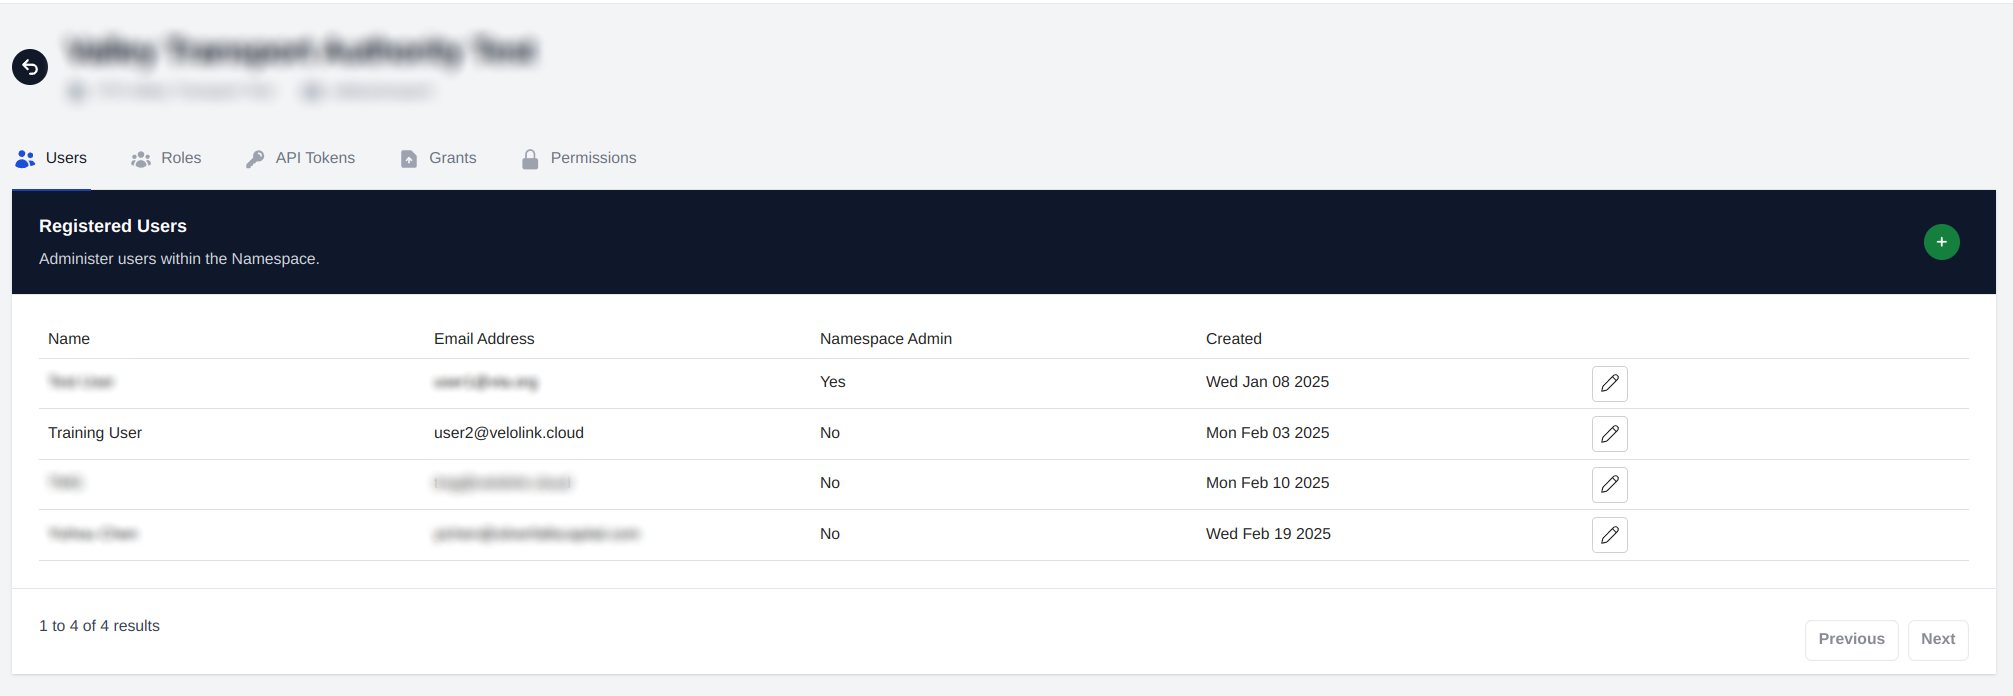
3. Create New User
-
Click the "+" button to open the user creation form
-
Fill out the required information:
- Email address
- First name
- Last name
- Role selection
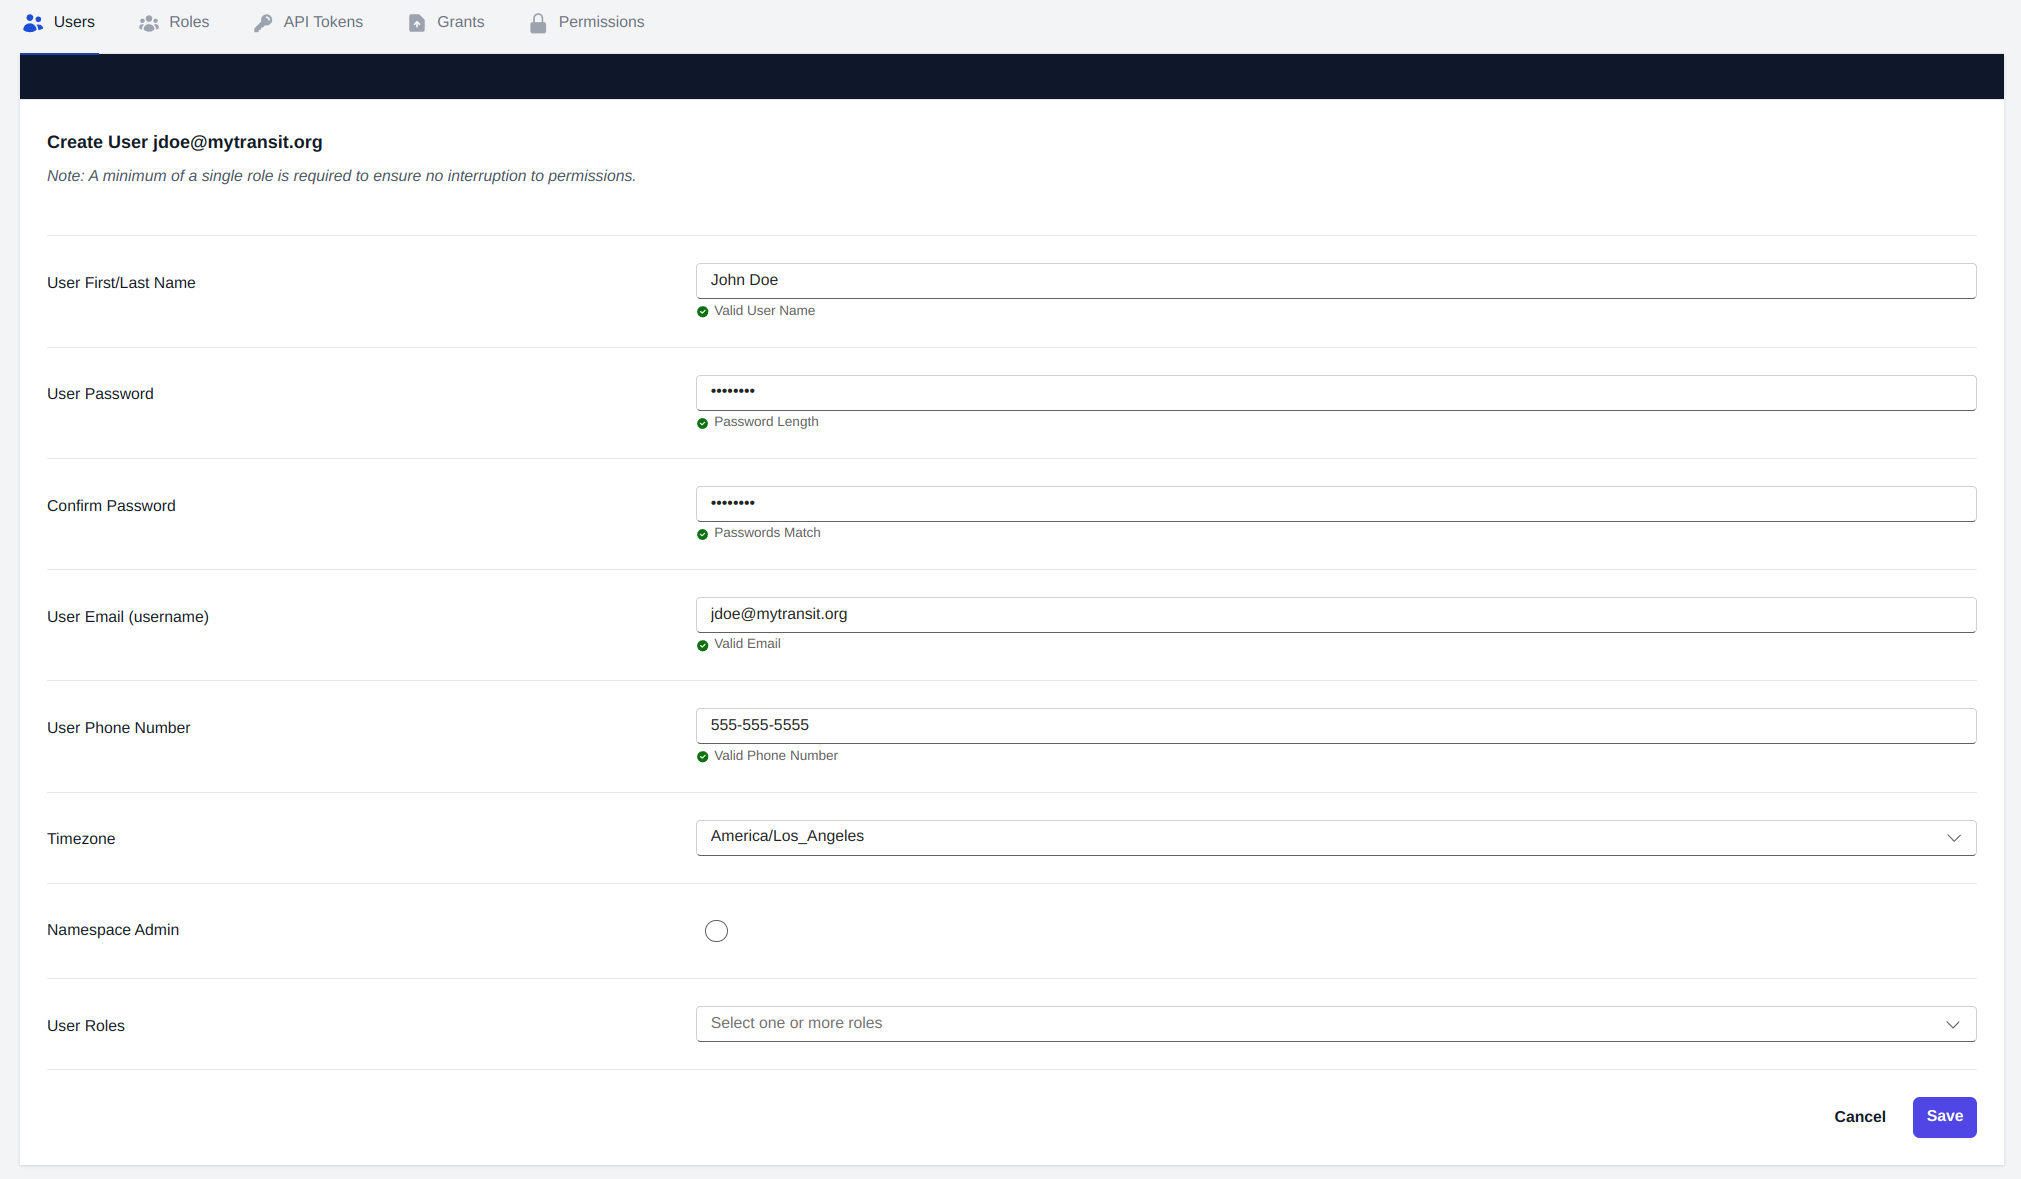
4. Select Appropriate Role
When selecting a role, follow the principle of least privilege:
- Velolink User: Basic access with read-only data permissions
- Velolink Admin: Full access to data and settings
- Choose the most restrictive role that still allows the user to perform their required tasks
Post User Creation Process
- An email verification message will be sent to the new user's email address
- The user must click the verification link in the email to activate their account
- After verification, the user can either:
- Log in with the provided credentials
- Use the "Forgot Password" feature to set their own password
Important Notes
note
- Users cannot access the system until they verify their email address
- Role changes can be made after account creation if needed
- Users should be encouraged to change their password upon first login
- Regular audits of user roles are recommended for security
Best Practices
- Regularly review user access levels
- Remove or deactivate unused accounts
- Document role assignments for audit purposes